Yesterday I used Jamboard, Google’s live, interactive whiteboard, with students for the first time. I prepared three Jamboard slides to use in a “See – Think – Wonder” thinking routine, after watching a video together, so we could use it to make our thinking together visible. In this post I’ll review and reflect on how that went, and what I’ll do differently next time I use it during instruction.
Google explains Jamboard is a platform which can help you “Visualize your ideas in a new and collaborative way.” It’s been around awhile in Internet time, since 2016, and continues to be a $5000 touch-sensitive hardware platform (touch television) which can be used as an interactive whiteboard during live meetings. It’s also a cloud-based platform which is multi-platform, which means users in different locations can use it live / synchronously for idea collaboration and sharing. Perhaps because I tried it early, I’m able to use it with my consumer GMail account, but the Jamboard Help Center explains it’s available only for GSuite Google accounts. While Jamboard hardware is rather expensive and certainly isn’t free, the cloud-based Jamboard platform (accessible via jamboard.google.com) IS free and like other Google Drive documents, can be shared with others for public editing so no login is required.
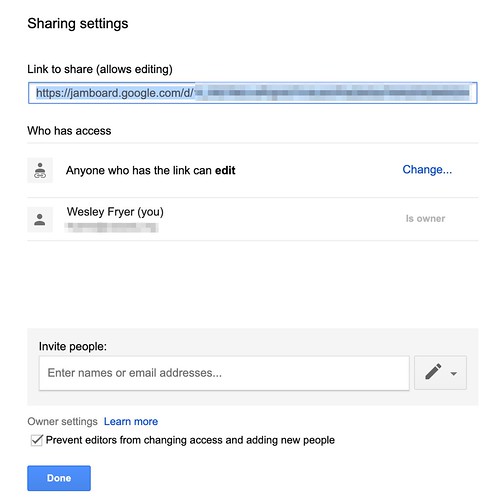
When I created my Jamboard before our lesson, I created three slides, added a title graphic at the top of each one (importing images from my iPad,) and set the sharing settings to allow ANYONE WITH THE LINK to edit the board. After the lesson, I changed this setting to view-only access, to hopefully prevent any intentional or accidental changes by others to these interactive slides.

“Google Jamboard Sharing Settings” (CC BY 2.0) by Wesley Fryer
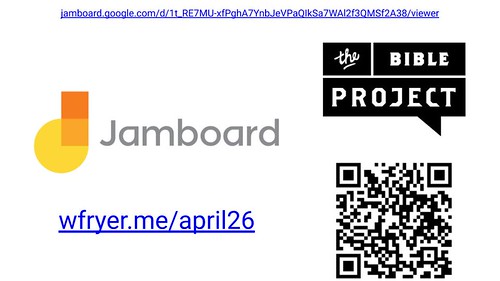
In advance of the lesson as well, I created both a shortened link and a QR code which my students could use on their device(s) to access the Jamboard. I included this as an introductory slide in our lesson slideshow, and explained we’d be experimenting with Jamboard as a new way to collaborate and make our thinking together visible. I suggested if anyone had an iPad, they could go ahead and download the Jamboard iOS app during the first part of the lesson to be ready, but that I would also add the link to our Jamboard to our videoconference chat, so anyone could access it via their web browser.

“Jamboard Lesson Access Instructions” (CC BY 2.0) by Wesley Fryer
As is the case with most classes, students our adult Sunday School class have a variety of digital literacy skills, so using a new website and app like this wasn’t something I was expecting lots of people to want to do or be able to do on short notice with success. We did, however, have a couple people add some content to our Jamboard slides, and it was enough to give me a little ‘taste’ for how I can use Jamboard again in the future for collaboration.
When it comes to sharing just text, a shared Google Document is definitely better to use with students than a Jamboard. I think it would be interesting to use Jamboard with students to create collaborative sketchnotes or visual notes, perhaps during a lecture or while watching a video. I don’t know that the “visual thinking” our Jamboard revealed during our lesson was better in any way because we used an interactive drawing rather than an interactive word processing platform. So my first big takeaway is to encourage students to DRAW SKETCHES of ideas when you’re using Jamboard, and not just focus on writing text. A combination of text and pictures is fine, but if you’re primarily wanting to reflect linguistically then stick with a shared Google Doc.
Secondly if possible, it’s good to give students more time to prepare in advance to use a new tool, with more advance notice to download a required app, get their stylus / Apple Pencil charged and ready, etc. I was able to use a 2nd Generation Apple Pencil to write on our Jamboard, and it worked well, but others who had to use their trackpads or a less capable iOS stylus on an older iPad were more challenged in writing clearly on the Jamboard.
The best scenario for using a Jamboard over a videoconference connection, as we were yesterday using GoToMeeting, would be for everyone to have a latest generation iPad and Apple Pencil (or Logitech Crayon) with the Jamboard iOS app pre-installed. It would also be good for students to connect to / open the Jamboard in advance of class, so they are (from a technical standpoint) ready to start collaboration.
I will note that the ACCOUNTABILITY features of Jamboard are very different from a Google Doc or other “older” file types in the Google Drive universe. There does NOT appear to be a ‘revision history,’ so we an all quickly imagine how some students might choose to use a ‘digital opportunity like this, sans documentation of contribution attribution,’ to draw or write inappropriate things. It’s frequently important when using live, interactive tools with younger students (like text chat) to remind them they are accountable for what they write and share. This is one reason we require that teachers record all “remote learning” videoconferences now with students, to provide a clear expectation and understanding of accountability for what we say and do in “virtual class” just as we have with face-to-face classes. Since Jamboard doesn’t appear to have a revision history, and even if it did the way I used it yesterday (not requiring logins from anyone) wouldn’t provide any individual-specific contribution / edit accountability anyway, I’m not sure if I’m quite ready to use Jamboard with my 5th and 6th graders.
I am, however, thinking more about the specific affordances of a live, interactive writing space like Jamboard, however. A few years ago I helped one of our middle school foreign language teachers use the live, synchronous collaboration features available in the latest subscription-version of Explain Everything (Edu-Groups), and we had mixed results. Those were due in part to our local WiFi bandwidth issues, but the goal was still partially achieved to let students collaborate live in a shared slideshow in which they could DRAW as well as WRITE.
If you’re considering live collaboration options with students, I definitely recommend using Google Docs and Google Slides for live collaboration FIRST before moving on to Jamboard. Jamboard has some unique capabilities and potential uses, especially for “non-linguistic representation,” which make it both exciting and useful.
Have you used Jamboard yet with a class of students? What have your experiences been, and lessons learned? Please let me know with a comment below or by reaching out on Twitter to @wfryer. Good luck safely Jamboarding to better make collaborative thinking visible!
If you enjoyed this post and found it useful, consider subscribing to Wes’ free, weekly newsletter. Generally Wes shares a new edition on Monday mornings, and it includes a TIP, a TOOL, a TEXT (article to read) and a TUTORIAL video. You can also check out past editions of Wes’ newsletter online free!
Did you know Wes has published several eBooks and “eBook singles?” 1 of them is available free! Check them out! Also visit Wes’ subscription-based tutorial VIDEO library supporting technology integrating teachers worldwide!
MORE WAYS TO LEARN WITH WES: Do you use a smartphone or tablet? Subscribe to Wes’ free magazine “iReading” on Flipboard! Follow Dr. Wesley Fryer on Twitter (@wfryer), Facebook and Google+. Also “like” Wes’ Facebook page for “Speed of Creativity Learning”. Don’t miss Wesley’s latest technology integration project, “Show With Media: What Do You Want to CREATE Today?”


