Cha-Ching! You just got your first paid freelance writing assignment. Edits go smoothly, the publication date is set, and there’s just one last thing to do.
“Shoot me over an invoice and I’ll submit it to accounting,” your editor says.
That’s when the frantic Googling commences. Because you’ve never created an invoice before. And you’re not sure where to start.
I’ve been exactly in this position. So I checked the first invoicing tool my freelancer friends recommended. Freshbooks made it so easy for me to create my first invoice that I was instantly sold. It’s now my go-to invoicing tool — and it helps me with other business tasks, too.
Here’s everything you need to know to open a free Freshbook account, create your first invoice and get paid.
1. Create your Freshbooks account
Good news: Since you’re new to invoicing and Freshbooks, you need not pay for anything (yet). Freshbooks offers an honest-to-goodness truly free 30-day trial. You don’t even need to put in your credit card.
So simply head to the Freshbooks homepage and get started by entering your name and email.
What happens when your free trial ends? You have to choose one of their paid plans. The most affordable Freshbooks plan is called Lite, which gives you a maximum of five clients at $15 per month.
2. Add your first client
Adding your first client is the next step. The only required information is the name of the company you’re invoicing and an email address. Your editor might want to receive the invoice, or they may want you to send it straight to their invoicing department instead. So check to make sure you’re dropping in the right email address here.
You can add other information in this step such as the company’s mailing address. But if you don’t have this info and your client doesn’t require it, then don’t worry. Hit save, and you’re ready for the next step.
3. Create your invoice
Once you hit save, you’ll have a few options. Some of these may come in handy later, but for now click the arrow next to the “Create New” button and select “Invoice.”
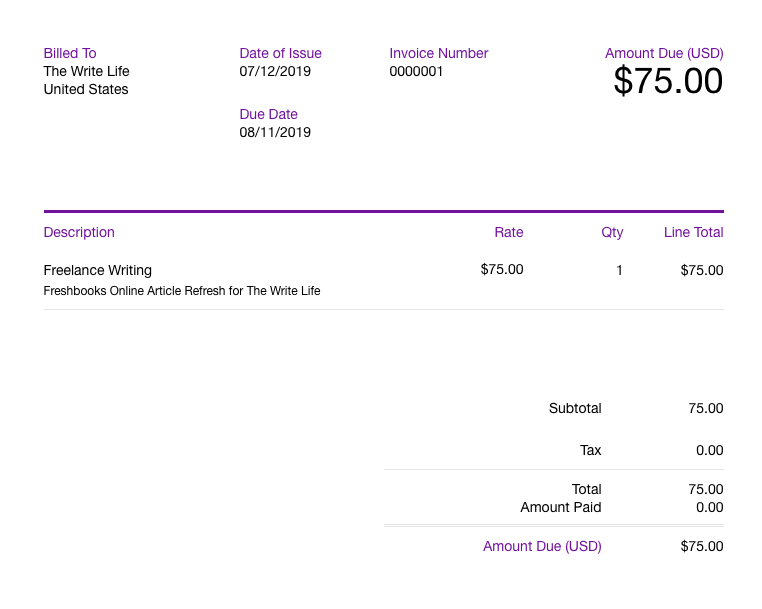
You’ll see that your invoice number and date of issue are pre-filled. You can change these if you like, or just leave them as-is.

Then you’ll need to enter a few details:
Item: Add a new line and write the item or service you are billing for. The item name cannot be more than 50 characters long. Then add a description just below the item name with detail about the work you’re invoicing for. For example, it could be a blog post, online article or editing services. If you create more invoices down the line, you can reuse these items or create new ones.
Rate and hours: If you’re paid hourly, enter your rate and hours in these two columns. If you’ve agreed to a flat fee per project — for example $75 for one blog post — then enter your project total in rate and bill for one hour. If you’re billing for multiple assignments (go you!) then add a line and repeat the above steps.
Logo: If you have a business logo, insert the file directly into the invoice by dragging and dropping or uploading from your computer. This creates a more polished-looking invoice when the client receives it.
Time tracking: You can also generate an invoice directly from your billable hours that you have tracked under the “Time Tracking” section. Simply click “Generate Invoice” and select the appropriate hours listed for that client.
![]()
4. Add terms and notes
You aren’t required to add anything to these terms and notes boxes. But should you? It’s always a good idea to agree on terms with a client beforehand, so this is a great place to add a reminder. You can use the notes box to send along a friendly note to your client to let them know you enjoyed working together and look forward to your next assignment.
According to Freshbooks, you’ll get paid five percent faster if you add a dash of politeness to your invoice. A simple “Please pay your invoice within 30 days” in your terms and “Thank you for your business!” in the notes can go a long way.
5. Hit send
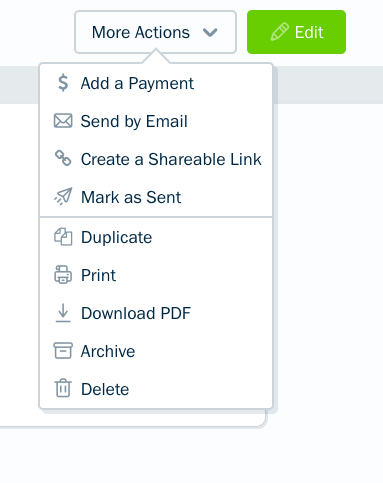
Once you’ve double checked the details, you’re ready to send! When you click send by email, you’ll receive a pop-up to review the email subject and body your client will see. You can edit both of these to further personalize your invoice.
If your client doesn’t use email, there is also the option to copy a shareable link for the invoice. This gives you and your client a little flexibility.

6. Get paid
Now all you have to do is wait to get paid! There are a few things you can do ensure payment and remind clients in case they forget to pay.
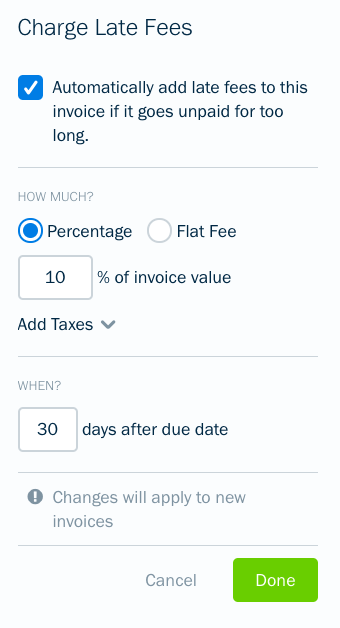
- Be sure to set payment terms, and include those at the bottom of your invoice; for example, a 15 percent late fee after 30 days. While editing an invoice, you can set up an automatic late fee of either a percentage or a flat rate if the client does not pay on time.
- Log into Freshbooks at anytime to see if the client has viewed your invoice. If they haven’t, you can easily resend it.
- Automatically send late payment reminders. Go to edit invoice > send reminders > automatically send payment reminders. You can set up to three reminders that auto-send if your client doesn’t pay within a certain time frame.

Ready to create your first invoice? Try a trial run first by sending an invoice to yourself. Make a new client (yourself) and follow the above steps. Then you can review your invoice, see what it looks like from the client’s perspective and make sure you’ve got the process down.
Sounds easy, right? Head on over to Freshbooks to give it a whirl! Happy invoicing!
This post was updated in July 2019 so it’s more useful and relevant for our readers! It was originally written by Betsy Mikel and updated by The Write Life team.
This post contains affiliate links. That means if you purchase through our links, you’re supporting The Write Life — and we thank you for that!
The post The Beginner’s Guide to Freshbooks: How to Create an Invoice appeared first on The Write Life.
Source : The Beginner’s Guide to Freshbooks: How to Create an Invoice


